
Websites are complex, and the smallest details can have significant impacts. In the rush to launch, it's easy to overlook things that might seem minor but are crucial to your website's success.
A broken link, a misspelled word, or an unoptimized image can greatly affect the user experience and your site's overall performance.
A checklist helps you catch and correct such errors before the site goes live.
This comprehensive approach is crucial when integrating platforms like Shopify and Kajabi. You will build a foolproof website that excels in e-commerce functionality, engaging content, and effective marketing strategies.
By connecting your Shopify Collection to your Kajabi site, you unlock the potential to sell physical products efficiently and leverage Kajabi's comprehensive content management and marketing capabilities.
In this guide, we’ll provide you with a website launch checklist and practical advice on optimizing your website's structure, enhancing SEO, ensuring mobile responsiveness, and more.
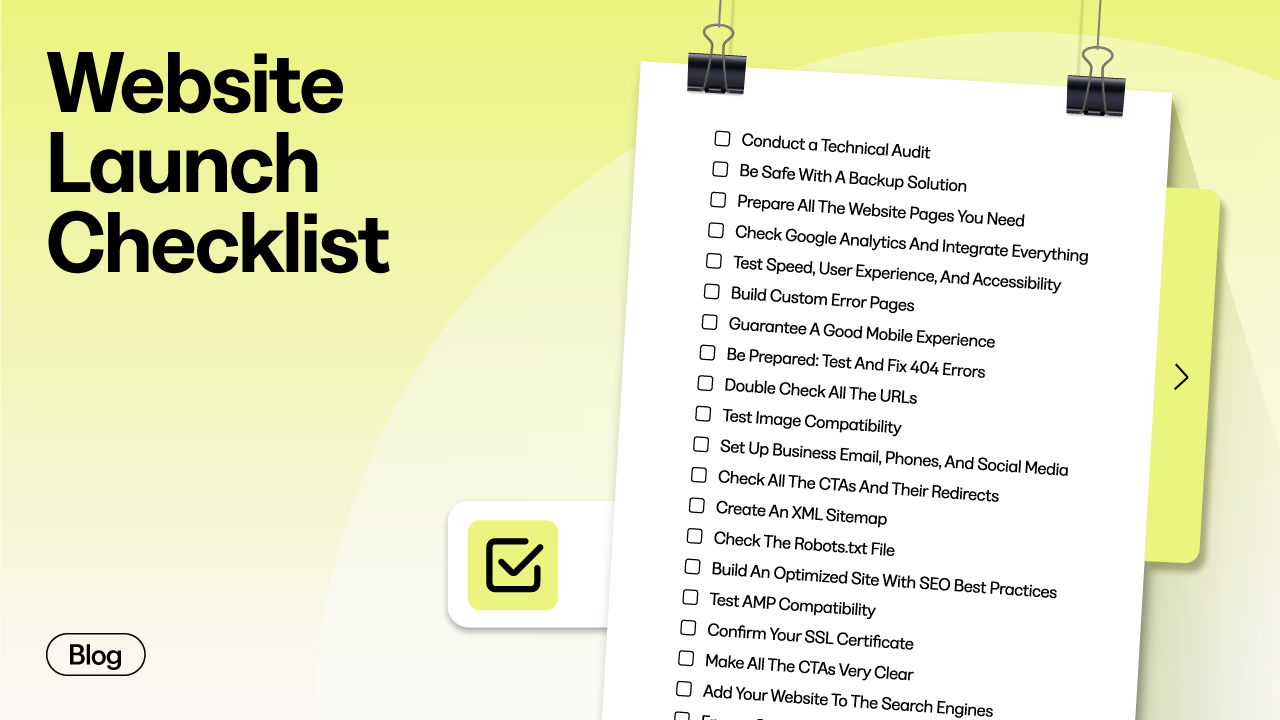
Your Website Launch Checklist In 20 Tips
1. Conduct A Technical Audit
A technical audit is a thorough check-up of your website to ensure everything is working properly, is secure, and offers a good user experience.
It examines the under-the-hood elements of your website that affect its functionality and performance.
This includes server performance, security vulnerabilities, code efficiency, and more. Unlike checks for user experience or content, a technical audit looks at what makes your website work from a technical perspective.
Why is technical audit important?
Before launching, you must ensure that your site's foundation is solid. Technical issues can lead to slow load times, security breaches, or total site failures. Conducting a thorough audit ensures your website is built on a strong, reliable, secure platform.
Focus on these key areas:
- Server Performance and Configuration: Check your server’s response times. Ensure it’s configured correctly for your website’s needs. Evaluate the hosting environment and ensure it can handle your expected traffic.
- Security Checks: Besides having an SSL certificate (which we’ll cover later), you need to examine your site for potential security threats. Check for vulnerabilities in your code to ensure secure data transmission. This protects against common threats like SQL injection and cross-site scripting.
- Code Efficiency: Check for redundant or outdated code, ensure scripts are optimized, and look for any coding errors affecting performance.
- Load Testing: This differs from simple speed testing by simulating high traffic to see how your site performs under pressure. It helps predict how your site will handle real-world use.
- Website Architecture: Review your website’s structure. Is it logical and efficient? Check the navigation hierarchy, URL structure, and internal linking strategy. If you had created wireframes before building your website, revisit them during the technical audit. Compare the initial vision with the current implementation.
Various tools can help with your technical audit. Here are some examples:
- For server response times and speed, use GTmetrix or Pindgom.
- For security, use Sucuri or Qualys.
- For code efficiency, use W3C Validator.
- For load testing, use K6 (formerly called Load Impact) or Apache JMeter.
Start by creating a checklist of the areas you need to audit. Use the tools above to gather data and identify issues.
Document your findings thoroughly. If you're not technically inclined, hire a professional to conduct the audit. This ensures that no critical issues are overlooked.
Once the audit is complete, prioritize the issues you’ve found. Some might need immediate attention, while others can be scheduled for later. Implement the necessary fixes and retest to ensure the issues are resolved.
Expert Tip: Technical audits should be ongoing, not just a one-time task.
2. Be Safe With A Backup Solution
A backup solution is your safety net. It protects your website against data loss due to unforeseen events like server crashes, hacking, accidental deletions, or simple human errors.
No matter how secure or well-maintained your website is, there's always a risk of data loss.
With a backup solution, you can quickly restore your website to its previous state without significant downtime or data loss.
Remember, website downtime can be quite costly. According to Shopping Cart Elite, your website's SERP rankings drop by an average of 30% after six hours of downtime and stay that way until the next Google refresh, which takes 30 to 60 days.
There are several backup solutions available. The most common types include:
- Cloud-Based Backups: These are hosted on third-party servers, provide remote access and scalability, and often come with easy-to-use interfaces.
- Local Backups: This is storing data on local storage devices like hard drives. While they provide quick access, they can be vulnerable to physical damage or loss.
- Automated Backups: Many web hosting services offer automated backup options, in which your website data is periodically backed up without manual intervention.
For example, using Kajabi, you can manually back up important elements like product templates, pages, and contacts.
First, create a folder on your computer, an external hard drive, or a cloud-based storage solution like Google Drive, OneDrive, or Dropbox.
To export and backup product templates, follow these steps:
- Open Kajabi and navigate to the 'Products' tab from the Dashboard.
- Select the Course Product you want to edit or create a new one.
- Click on “Customize” to access the customization options.
- Find the “Product Template” card and click on the ellipsis (…).
- Choose “Export as zip.” This will prepare your Course Product Template to be downloaded as a .zip file.
- Once the export process is complete, Kajabi will send an email to the email address associated with your account. Check your inbox for an email from Kajabi Support containing a link to download the .zip file of your exported Course Product Template.
You can then upload this .zip file to your backup folder.
If you're using WordPress, you can take advantage of automatic backup solutions using plugins like UpdraftPlus.
When choosing automatic back-ups for your website, consider the following features:
- Frequency: How often do the backups occur? Daily backups are recommended for dynamic websites.
- Reliability: The assurance that backups are consistently successful and data is not corrupted.
- Security: Protection of your backup data with encryption and secure storage.
- Ease of Restoration: The ability to quickly and easily restore your website from a backup.
- Scalability: The ability to increase storage as your website grows.
3. Prepare All The Website Pages You Need
One key step in launching a website is ensuring all necessary pages are created, optimized, and ready for visitors.
You should organize and structure your website to effectively communicate your message and meet your audience's needs.
The first step is to identify which pages are essential for your website. For example, some of the most crucial pages include:
- Home Page: The first page most visitors will see. It should clearly convey what your website or business is about and guide visitors to other sections of the site.
- About Page: This page tells your story, shares your mission, or provides background information about your team or company.
- Product or Service Pages: If you’re selling products or services, each should have its own page with detailed information.
- Contact Page: A must-have for visitors to contact you. Include various contact methods and possibly a contact form.
Create engaging, informative content for each page aligned with your brand voice.
Ensure that the content is well-written, error-free, and provides value to your audience. Incorporate relevant keywords naturally, use appropriate meta tags, and ensure each page is optimized for search engines.
You should also test to see if the pages contribute to a seamless user experience:
- Is the website navigation intuitive, with a clear menu structure allowing visitors to easily find what they're looking for?
- Each page should be optimized for mobile devices, providing a consistent experience across all platforms.
- Optimize images and scripts to ensure that pages load quickly.
- Check all links, buttons, forms, and interactive elements to ensure they function correctly.
4. Check Google Analytics And Integrate Everything
Google Analytics provides insights into your website’s traffic, user behavior, and overall performance.
Before launching, ensure Google Analytics is properly set up and integrated with your website.
Note that Google has officially transitioned to Google Analytics 4 (GA4) as the default version for new properties.
- First, log in to the Google Analytics dashboard at analytics.google.com.
- Click the "Start measuring” button to set up your account.

- Once signed in, you'll be prompted to create a new account. Name it after your business for easy identification.
- After creating an account, set up a property for your website. Input your website's name, select your time zone, and choose a currency.
- Choose the category that best represents your business and specify your business size.
- Pick your business objectives or select “GI Baseline Reports” for standard report layouts. Agree to Google's terms to proceed.
- Select “Web” as your platform to track data on your website. Provide your website URL (without "https://") and give the stream a name.
- Google Analytics will then generate a tracking code. Copy this code.
To connect Google Analytics to your Kajabi website, go to your Google Analytics and copy the tracking code from the steps above.
Now, head over to your Kajabi Dashboard. Click on “Settings” at the bottom of the left sidebar. Select “Third Party Integrations,” scroll down to find Google Analytics, and turn the toggle to “On.” Paste your Tracking ID into the “Google Analytics ID” field. Click “Save” to apply your changes.
5. Test Speed, User Experience, And Accessibility
How crucial is your website’s speed?
- The bounce rate increases by 32% when a page load time goes from one to three seconds.
- Website speed directly affects conversion rate. Users stay longer on fast-loading sites and convert at higher rates than slower sites.
- Approximately 53% of mobile users will leave a website page if it takes more than three seconds to load.
In addition, Google has long considered website speed a factor in search engine rankings.
Utilize Google PageSpeed Insights regularly. This tool tests your website's speed and identifies specific issues that need attention.
Also, consider the following:
- Optimizing Images: Large image files significantly slow down your website. Optimize images by compressing them and using the correct file formats.
- Minimizing HTTP Requests: Reduce the number of elements (like images, scripts, and CSS files) that need to load on your site. Use CSS sprites, combining files and streamlining elements on your pages.
- Utilizing Browser Caching: When you leverage browser caching, returning visitors can load your site faster, as their browser saves elements of your pages.
- Enhancing Server Response Time: You can improve server response time by choosing a reliable hosting solution, optimizing your server software, and using a content delivery network (CDN).
User experience goes hand in hand with website speed. A fast-loading site is a starting point, but how users interact with your site is equally important.
Ensure your website is easy to navigate with a clear, intuitive layout. Users should be able to find what they are looking for with minimal clicks. Any interactive elements, like forms or calls-to-action, should also be easy to use and functional.
In addition, accessibility cannot be overstated. Making your website accessible means ensuring all users, including those with disabilities, can use and navigate your site.
- Follow Web Content Accessibility Guidelines (WCAG) to make your site accessible. This includes providing text alternatives for non-text content, making it easier for screen readers to interpret your site.
- Use high-contrast color schemes for readability, ensure your website can be navigated with a keyboard, and provide alternatives for multimedia content.
- Just like speed testing, conduct regular accessibility checks using tools like WAVE or AXE.
Website speed, user experience, and accessibility are deeply interconnected and collectively important for the success of your website.
6. Build Custom Error Pages
Custom error pages are specialized web pages displayed to users when encountering specific errors while browsing a website.
Unlike standard error messages generated by web servers, custom error pages are designed by the website owner to inform the user more clearly and helpfully about the error they've encountered.
They are created for common HTTP status codes like 404 (Page Not Found) or 500 (Internal Server Error).
When creating custom error pages, ensure that the design and tone of your error pages are consistent with the rest of your website. Use your brand colors, logo, and style.
Clearly communicate what the error is and why it might have occurred. Avoid technical jargon that may confuse users.
Ensure you provide direction when a user encounters an error.
How do you do this? Include links to your home page, popular products, or search feature. You can also add a search bar to help users find what they want.
In case of persistent problems, provide a way for users to contact you. This could be a support email address or a link to a contact form.
7. Guarantee A Good Mobile Experience
Mobile devices account for 58.67% of global website traffic, so it's essential to ensure your website is optimized for mobile users.
Responsive design means your website's layout and content adjust seamlessly to various screen sizes and devices.
You can also manually test by viewing your site on different devices or using the device simulation feature in browser developer tools (like Chrome DevTools).
Start by opening Google Chrome and navigating to your website. Make sure you are on the page you want to test.
Once your site is loaded, right-click, and on the menu that appears, click “Inspect.”

In the Developer Tools panel, find the “Elements” tab and click on it. This tab shows the HTML structure of your web page.
At the top of this panel, look for an icon resembling a small tablet and phone. This is the “Toggle device toolbar” button. Click on it.

Once clicked, your website view will change to simulate how it appears on a mobile device. With the device toolbar enabled, you’ll see a dropdown menu at the top of your browser screen, typically set to a default device like “Responsive.”

Click on this dropdown menu to see a list of devices like iPhones, iPads, and various Android phones and tablets. Select any device from the list to see how your website adapts to that particular device's screen size and resolution.
You can rotate the view to simulate landscape orientation by clicking the rotate icon next to the device dropdown menu.

As you review your site on different devices, consider how elements like text, images, buttons, and other components appear and function.
Look for layout issues, overlapping elements, text too small to read, images that don’t resize properly, or interactive elements that don’t work as expected.
Take notes of any issues so you can address them in your website’s design and coding.
Expert Tip: Device simulation in Chrome Developer Tools is a powerful way to test your website, but it may not perfectly replicate every aspect of using actual devices. Therefore, it’s always a good practice to test on real physical devices when possible.
8. Be Prepared: Test And Fix 404 Errors
A 404 error, or "Page Not Found" error, occurs when a user tries to reach a webpage that doesn't exist. This could be due to a mistyped URL, a broken link, or a page that has been moved or deleted.
Frequent 404 errors can frustrate users and might lead them to leave your website. While these errors don't directly harm your search rankings, they indirectly affect SEO by increasing bounce rates and reducing user engagement.
Use a link checker tool like Google Search Console, Ahrefs, or Screaming Frog SEO Spider to scan your website and identify broken links that lead to 404 errors.
Also, periodically check the links on your website manually, especially after changing your site's structure or content.
If a link is broken because the target page has moved, update the link to point to the correct page. If the page no longer exists, remove or replace the link.
For pages that have been moved or deleted, use 301 redirects to guide users and search engines to a relevant page. This helps retain traffic to your website and preserve search rankings.
Remember the custom 404 errors we talked about earlier? While not a fix, a custom 404 page can improve the user experience by providing helpful information and links to navigate back to active parts of your site.
9. Double Check All The URLs
This is where you verify that every link leads to the correct page and that there are no broken or incorrect URLs.
Search engines favor websites with a clean, well-organized link structure. Broken links negatively affect your SEO performance.
The first step is to manually review critical links (like those in your main navigation, footer, or call-to-action buttons) to ensure they are functioning as intended.
What should you look for:
- Correct Destination: Ensure each link directs to the intended webpage.
- Proper Formatting: Check for typos or URL errors, such as missing characters or incorrect domain names.
- Redirects: Make sure any redirects are intentional and correctly implemented, especially 301 (permanent) redirects for any moved content.
Set a schedule to audit your site’s URLs regularly. The frequency depends on how often you add or update new content.
10. Test Image Compatibility
Images play an important role in enhancing visual appeal and user engagement. However, they are also the largest assets on a webpage and can consume a substantial amount of bandwidth.
This high bandwidth usage can detract from the efficiency of loading other essential page assets, leading to slower overall page load times.
Test how images perform across different devices and browsers to ensure broad compatibility and maintain fast loading times.
Check their appearance and load times on various screen sizes and resolutions, from desktop monitors to smartphones. Inconsistent image display leads to a fragmented user experience, where the website's visual appeal varies significantly from one device to another.
- If possible, test your website on actual hardware, such as smartphones, tablets, and desktops. This provides the most accurate representation of user experience.
- Check that images adjust appropriately for different screen sizes and resolutions. They should be clear and not pixelated or overly compressed.
If images are slow to load, optimize them by compressing the file size, using appropriate formats (like WebP for Chrome), and implementing responsive image solutions.
Also, ensure that all images have descriptive alt text. Alt tags provide a text alternative for images, aiding screen reading tools used by visually impaired users to understand the content of the images.
Alt tags are important as you can incorporate your keywords here.
11. Set Up Business Email, Phones, And Social Media Profiles
In 2022, over 4.59 billion people were using social media worldwide. This is expected to rise to nearly 6 billion by 2027.
Additionally, according to Fundera statistics, 71% of consumers who have had a positive experience with a brand on social media are likely to recommend it.
These figures show the importance of being present and actively engaging on these platforms.
So, before you launch your website, start by setting up dedicated communication channels that include a professional business email, a reliable phone system, and active social media profiles.
- Business Email: Create a professional email address that matches your domain (e.g., contact@yourdomain.com). This will promote brand consistency and convey professionalism to customers and business associates.
- Phone System: Set up a dedicated business phone line or a VoIP service. This will help you manage customer calls more efficiently and separate your personal and professional communications.
- Social Media Profiles: Establish profiles on key platforms where your target audience is most active, such as Facebook, Instagram, LinkedIn, and X (formerly Twitter), and potentially emerging platforms like TikTok that resonate with your audience.
Next, add social media icons to your website that link to your profiles. Place them in the header, footer, or sidebar. Also, integrate social media feeds or share buttons on relevant pages, such as blog posts or product pages.
Ensure that all communication channels are interconnected. For example, use social media to drive traffic to your website and vice versa. Make sure to keep your branding and messaging consistent across your website and all social media platforms.
12. Check All The CTAs And Their Redirects
If you mess up your CTAs, you risk losing potential customers at a critical point in their journey on your website.
CTAs drive your site's user engagement and conversion strategy. They guide users to take desired actions — subscribing to a newsletter, purchasing a product, or contacting your business.
Start by conducting a thorough review of your website. Check each CTA on every page for functionality, clarity, and persuasiveness. Each CTA should stand out and communicate a clear message — what action should the user take, and what can they expect as a result.
- Click on each CTA to ensure it responds as intended. A non-responsive or slow CTA will deter users.
- Ensure clickable elements like buttons or links are easily identifiable and accessible.
- After clicking a CTA, check that you're redirected to the correct page.
- Pay attention to the loading speed of the redirected pages as well.
Lastly, consider using methods like A/B testing to gauge the effectiveness of different CTA designs and placements.
What works best may vary depending on your audience and the specific context of your site.
13. Create An XML Sitemap
An XML sitemap is a file that lists all important pages of your website in a format that is easily readable by search engines.
It acts like a roadmap, guiding search engines to discover and index your site's pages more efficiently.
By providing this structured layout of your site, an XML sitemap helps improve the crawling of your website, potentially enhancing its visibility and SEO performance.
You can use online tools and website plugins to generate an XML sitemap automatically. For instance, if your website is built on WordPress, you can use a plugin like Yoast SEO.
Your sitemap should include all of your site's key pages. To help search engines understand your site, you can also specify the frequency of updates and the relative importance of pages.
After creating your sitemap, the most common place to submit it is Google Search Console.
Search engines like Google are capable of eventually discovering your sitemap on their own, but actively submitting it to the Google Search Console expedites the process of your site's content being noticed and indexed.
You need to sign in to your account (or create one), select your website, go to “Sitemaps” under the “Index” section, and add the URL of your sitemap.

To view your sitemap, type your site URL in a web browser followed by /sitemap.xml.
If you make significant changes to your website, updating and resubmitting your sitemap prompts Google to re-crawl your site.
Google Search Console also provides insights if there are issues with your site’s pages, which is crucial for maintaining the health of your site.
14. Check The Robots.txt File

The robots.txt file is a text file that tells web crawlers, like those used by search engines, which pages or sections of your website are allowed or disallowed to crawl and index.
It's part of the Robots Exclusion Protocol (REP), a group of web standards that regulate how robots crawl the web, access and index content, and serve it up to users.
Why should you create a robots.txt file for your website?
- Control Crawler Traffic: You can prevent search engines from indexing certain parts of your website, such as admin pages or certain directories, ensuring only relevant content is shown in search results.
- Prevent Resource Wastage: It helps in saving server resources. Without a robots.txt file, crawlers will index irrelevant pages and use your server's bandwidth.
- Privacy and Security: While not a foolproof method for hiding information, you can use it to keep certain pages out of public search results.
Creating a robots.txt file is a straightforward process.
Start by opening a plain text editor on your computer. A Notepad on Windows, TextEdit on macOS set to plain text mode, or any other basic text editor that doesn't add formatting.
Type in the directives for the web crawlers. The basic syntax includes User-agent and Disallow commands:
- User-agent: [crawler name] specifies which web crawler the rule applies to. For example, User-agent: Googlebot targets only Google's crawler, while User-agent: * targets all crawlers.
- Disallow: [URL path] tells the crawler which directory or page to avoid. For example, Disallow: /private/ tells the crawler not to access the contents of the "private" directory.
Save the file as robots.txt. Ensure it is plain text with no additional extensions like .txt or .rtf.
Upload the robots.txt file to the root directory of your website. This is the highest-level directory that houses your website's content (the same directory where your website’s home page is located).
The URL to access your robots.txt file should then be http://www.yourdomain.com/robots.txt.
15. Build An Optimized Site With SEO Best Practices
Building an optimized website with SEO best practices involves a holistic approach. It touches every aspect of your site, from the content you create to the technical infrastructure behind it.
The goal is to enhance your site's visibility in search engine results.
Start with keyword research. Tools like Google Keyword Planner or SEMrush help you integrate these keywords naturally into your content, including titles, headings, and the body, without overstuffing.
The quality of your content is also very important. Search engines favor content that offers real value to users. Google says relevance is the top ranking factor. This means original, well-written articles, informative blog posts, engaging videos, and infographics will usually rank higher.
Review your site content before launching to see if it’s relevant and authoritative. Evaluate whether the content addresses the questions, needs, or interests of your target audience. It should be tailored to their preferences, challenges, and what they are searching for online.
Check whether you have used images, videos, infographics, or interactive tools. These enhance user engagement and make complex information more digestible.
On-page SEO is also important. So, optimize each page with unique, descriptive title tags and meta descriptions, structure content with proper header tags, and ensure images have descriptive alt texts.
These elements help search engines understand your content and index your pages appropriately.
Lastly, check your internal linking and backlinking. By linking to other pages on your site, you help search engines crawl your site more effectively and understand the relationship between different pages.
On the other hand, links from reputable and relevant sites act as endorsements, increasing your site's authority and ranking potential.
16. Test AMP Compatibility
If your website focuses heavily on content like news articles, blogs, or informational pages, you should test AMP (Accelerated Mobile Pages) compatibility.
AMP is an open-source framework developed by Google in collaboration with others. It enables web pages to load quickly on mobile devices, enhancing the user experience significantly on smartphones and tablets.
While AMP is not a direct ranking factor, faster load times and improved user experience indirectly boost SEO.
If you haven’t already, start by implementing AMP on your website. This involves creating an alternate version of your site or pages that follow AMP specifications.
How do you test for AMP compatibility?
- Google offers an AMP testing tool that allows you to enter a URL and check whether the page is AMP-compatible. It confirms the compatibility and points out any errors or issues.
- For a more technical approach, use the AMP Validator extension available in web browsers like Chrome.
As you update your website, ensure that your AMP pages are updated and continue to function correctly.
17. Confirm Your SSL Certificate
SSL certificates encrypt data transmitted between a user's browser and your website, ensuring that sensitive information like personal details and credit card numbers are securely transferred.
Websites with SSL are marked as “Secure” in the browser address bar, which instills confidence in your visitors.

Cyber Security News says that e-commerce sites with SSL certificates get an 18-87% increase in conversions.
Google also gives a ranking boost to websites that are secure with SSL.
Most hosting providers offer SSL certificates as part of their packages, so your provider probably already has one.
You can check your hosting dashboard or contact your provider to confirm your SSL certificate is active and installed.
After installing an SSL certificate, thoroughly test your website to ensure all pages load over HTTPS without any security warnings.
Check for mixed content issues, where some elements might still be loaded over an insecure HTTP connection. This can cause warnings in users’ browsers.
Also, remember to keep track of your SSL certificate’s expiration date. Expired certificates lead to security warnings in browsers. Set reminders to renew your certificate or opt for auto-renewal options if your provider offers them.
18. Make All The CTAs Very Clear
Clear and compelling Calls to Action (CTAs) guide visitors through your website and encourage them to take desired actions.
Use simple, straightforward language that tells users exactly what action you want them to take. Avoid vague phrases. Instead, use action-oriented words like “Buy Now,” “Sign Up,” “Learn More,” or “Contact Us.”
For example, Kajabi uses a blue color and a clear call-to-action—START YOUR FREE TRIAL—on our CTA on the homepage to draw attention.

Here are more ways to craft clear CTAs:
- CTAs should be easily noticeable. Use colors that stand out against the background but align with your website’s overall design.
- Place CTAs where they’re most likely to be seen and clicked.
- Maintain consistency in the design of your CTAs throughout your website.
- Each CTA should have a clear value proposition. Let users know what benefits they can expect by taking action. For instance, a “Download Free eBook” CTA is more compelling when accompanied by a brief note on what the eBook offers.
19. Add Your Website To The Search Engines
You might ask yourself, do I need to submit my website to search engines? The answer is that while it's not absolutely necessary, it can be beneficial, especially for new websites.
Modern search engines like Google and Bing are quite proficient at discovering and indexing new content.
However, manually submitting your website can speed up the indexing process and give you more control over how your site is crawled and indexed.
Submit Your Site To Google
The primary tool for submitting your site to Google is the Google Search Console. First, sign up for an account and verify your website ownership by following the instructions provided by Google.
Once verified, you can submit your XML sitemap. This helps Google discover and index your pages more effectively.
Google Search Console also allows you to monitor how your site appears in search results, track indexing status, and identify any issues.
Add Your Site To Bing
Similar to Google, Bing offers Bing Webmaster Tools for website owners. Create an account and verify your site.
Submit your XML sitemap to Bing via the Webmaster Tools to facilitate the crawling and indexing of your website.
20. Ensure Compliance With Privacy Laws And Legal Regulations
With regulations like the GDPR in Europe, CCPA in California, and other data protection laws worldwide, you should ensure your website complies with the laws applicable to your audience.
Non-compliance can lead to hefty fines and damage to your reputation.
If your website targets a global audience, you must be aware of and compliant with international laws, not just those in your country.
Steps To Ensure Legal Compliance
- Create a comprehensive privacy policy clearly stating how you collect, use, store, and protect user data.
- Ensure your privacy policy is easily accessible on your website — link it in the footer.
- Draft terms of service or use that outline the rules and guidelines for using your website. Include copyright information, disclaimers, and liability limitations.
- If your website uses cookies (most do), ensure you have a cookie policy in place. Implement a cookie consent mechanism that complies with laws like the GDPR, where users must opt-in to non-essential cookies.
- Be transparent about the data you collect from visitors. This includes data collected through forms, analytics tools, and third-party services.
- If your website is an e-commerce, be aware of consumer protection laws. Have clear information on returns, refunds, and shipping policies.
Final Thoughts
Launching a website requires careful planning and attention to detail.
As you move through this website launch checklist, remember that your website represents your brand and a gateway to connect with your audience.
So, ensuring that each element of your website aligns with your overall brand strategy and business goals is crucial.
What if you could streamline these steps, making the process more efficient and effective?
With the Kajabi website builder, the platform handles many technical aspects. This includes optimizing for speed and mobile responsiveness, ensuring a smooth experience right out of the box.
Our tools are also designed with SEO in mind, offering features that help optimize your content, structure, and on-page elements, aligning with the best SEO practices outlined in our checklist.
This saves you time and ensures you adhere to the best website development and management practices.
Get started with Kajabi today with a 14-day free trial.
Website Launch Checklist: Frequently Asked Questions
How To Launch A Website?
- Define your goals, target audience, and the type of content you will offer. Decide on the structure and design of your site.
- Select a unique and relevant domain name that reflects your brand and register it. Also, choose a reliable hosting provider that suits your website's needs in terms of storage, bandwidth, and scalability.
- Design and develop your website. You can use a website builder like Kajabi or a content management system (CMS) like WordPress or hire a web developer.
- Populate your website with high-quality, relevant content that engages your audience.
- Implement SEO best practices to improve your website's visibility in search engine results.
- Before launch, thoroughly test your website for functionality, loading speed, and mobile responsiveness. Use the website launch checklist above.
- Once everything is set, take your website live by publishing it through your hosting provider.
Can I Launch A Website For Free?
You can launch a website for free using platforms like Wix or Weebly, which offer free hosting and website-building tools. However, there are limitations on customization, domain names, and functionality.
For example, free plans often come with the platform's ads displayed on your website, which you cannot control.
How Do You Announce A New Website Launch?
Use your social media channels to tease the launch with sneak peeks, countdowns, and behind-the-scenes content. When the site is live, announce it with a dedicated post linking to your website.
If you have an email list, send a launch announcement highlighting key features and what users can expect from your new website.
How Long Does It Take To Launch A Website?
The time varies greatly depending on several factors, including the complexity of the website, the platform used, the level of customization, and the resources available.
Here’s a general breakdown:
- Simple Websites (Personal Blogs and Portfolios): If you use website builders like Kajabi, Shopify, or Squarespace with pre-designed templates, you could launch within a few days to a week, assuming you have the content ready.
- Moderate Complexity Websites (Small Business Websites, Basic E-commerce): The timeline for sites requiring more customization, e-commerce platform integration, or additional features ranges from a few weeks to a couple of months.
- High-Complexity Websites (Large E-commerce Sites, Custom Web Applications): These require extensive planning, design, development, and testing. Such projects take several months to over a year.
How Much Is It To Launch A Website?
Here's a general idea of potential costs:
- Domain Name: Costs anywhere from $10 to $50 per year.
- Web Hosting: A few dollars per month for basic shared hosting to over $100 per month for dedicated hosting.
- Website Builder or CMS: Platforms like WordPress are free. Others like Kajabi, Wix, Squarespace, or Shopify have monthly fees ranging from $10 to $300.
- SEO and Marketing: Basic SEO can be done for free. Advanced SEO services cost anywhere from a few hundred to several thousand dollars.
- Maintenance and Updates: Costs vary widely. This includes software updates, backups, and security checks.